Brake fluid: important information and maintenance advice on changing the brake fluid

Brake fluid is a key component of the brake system and plays a crucial role in driving safety.
The task of brake fluid is to hydraulically transmit the force from the brake pedal to the brake pads.
It must be able to withstand high temperatures and pressures in all braking situations without evaporating.
In order to ensure the safety of the brake system, the brake fluid should be checked or changed regularly. We have set out below what you need to know and bear in mind to keep brake fluid working effectively.

Key facts at a glance

  • Brake fluid transmits the braking force: it hydraulically transmits the force applied to the pedal to the brake pads and in the process it must withstand high temperatures and pressures without evaporating.
  • DOT classes differ from one another technically: glycol-based brake fluids, such as DOT 3, DOT 4, DOT 4 LV and DOT 5.1, differ particularly when it comes to the boiling point and to viscosity, and must comply with the manufacturer’s specifications.
  • Moisture affects the braking effect: water absorption lowers the boiling point, which means that under high thermal stress, vapour bubbles may form, delaying the build-up of pressure and reducing braking performance.
  • Check the moisture condition regularly: in addition to checking the fill level and carrying out a visual inspection, the water content or boiling point should be monitored electronically; a change is required including situations when the water content exceeds 3% or the wet boiling point falls below 150 °C.
  • Changing and bleeding in accordance with the manufacturer’s instructions: when the brake fluid is being changed, the system has to be fully bled; in the case of ABS and ESP systems, diagnostic tools may be required to activate specific valves in the hydraulic block.
1. Types of brake fluid

Different types of brake fluid

Certain minimum standards have been laid down to ensure that brake fluid meets the safety requirement criteria. And to ensure that such criteria are observed, there is an internationally binding classification system established by DOT (“United States Department of Transportation”), which manufacturers have to take into account. The common glycol-based variants – DOT 3, DOT 4 and DOT 5.1 – differ in terms of boiling point, viscosity and compatibility. Higher dry and wet boiling points, and also lower viscosities enable greater thermal resistance and a faster response from the brake system. Other essential properties of brake fluid include corrosion protection, lubrication and good compatibility with the various materials used within the brake system.

2. Classification in accordance with DOT

Classification in accordance with DOT

The table below shows an extract of the minimum requirements for glycol-based brake fluids in accordance with DOT. The properties of brake fluids are defined in several standards, which are largely consistent with one another. The requirements set out in FMVSS 116 have the force of law in the USA and serve as a benchmark standard worldwide.

TYPEStandardsWet boiling point (°C)Dry boiling point (°C)Viscosity at 100 °C (mm²/s)Viscosity at
-40 °C (mm²/s)
DOT 3SAE 1703
ISO 4925 (Class 3) FMVSS 116 DOT 3
>140>205> 1.5< 1500
DOT 4SAE J1704
ISO 4925 (Class 4) FMVSS 116 DOT 4
>155>230> 1.5< 1800
DOT 4 LVSAE J1704
ISO 4925 (Class 6)
FMVSS 116 DOT 4
>165>250> 1.5< 750
DOT 5.1SAE J1704
ISO 4925 (Class 5.1/6/7)
>180>260> 1.5< 900

3. Requirements

Brake fluid requirements

Brake fluids such as DOT 3, DOT 4, DOT 4 LV and DOT 5.1 are based on a glycol compound containing corrosion inhibitors. These brake fluids have a high boiling point and good lubricating properties, but they are hygroscopic. This means that they absorb moisture from their surroundings, and this usually happens by diffusion through the brake hose or the expansion tank. If the water content in the brake fluid is too high, the boiling point drops. Under high thermal stress, this can lead to the formation of vapour bubbles in the hydraulic system and, consequently, to the failure of the brake system. For this reason, the dry boiling point, the wet boiling point and the viscosity of a brake fluid are all crucial factors.

Dry boiling point:

the dry boiling point refers to the temperature at which new, unused brake fluid containing no water begins to boil from a sealed container.

Wet boiling point:

the wet boiling point is defined as the boiling point reached by brake fluid to which 3.5% (percentage by weight) of water has been added under specified conditions.

Viscosity:

viscosity is a physical measure of a substance’s thickness and describes its resistance to flow. High viscosity means that the liquid is thick and less free-flowing; low viscosity indicates a thin, free-flowing substance.

As the temperature rises, the viscosity of most liquids decreases – they become thinner and therefore less viscous. This relation is particularly relevant for modern brake fluids used in vehicles fitted with electronic stability and brake systems such as ESP and ABS. Products such as DOT 4 LV and DOT 5.1 are specifically designed to ensure adequate flow properties even at low temperatures. This guarantees that the systems operate reliably, particularly during rapid control operations and in wintry conditions.

4. Effects of moisture

Effects of moisture on the brake fluid

If the brake pedal feels unusually soft or spongy when depressed, this may indicate that there is too much water in the brake fluid.
Water in the brake fluid lowers its boiling point, which leads to the formation of vapour bubbles during heavy braking and when the fluid heats up (e.g. when driving downhill).
Unlike liquid, vapour bubbles can be compressed.
This affects the build-up of pressure in the hydraulic system and ultimately leads to delayed braking performance and longer braking distances.
At the same time, water promotes corrosion in the brake system, which can lead to damage to brake lines, hydraulic components and ABS units. Fresh brake fluid is usually clear to slightly yellowish. A dark, brown or cloudy colour indicates ageing or contamination. Oxidation and moisture alter the colour and reduce its effectiveness.

5. Change intervals

Brake fluid change intervals

It is generally recommended that the brake fluid be changed every two years. However, the change intervals specified by the vehicle manufacturer for the relevant vehicle type should always be used as a guide. Only use brake fluids that are specified in the service booklet or on the cover of the expansion tank for the vehicle in question, or use those specified by the vehicle manufacturer.

6. Checking the brake fluid

Checking the brake fluid

The brake fluid should be checked regularly in order to ensure that the brake system works reliably.

The first thing to do is to check the fluid fill level in the expansion tank; the fluid level must be between the ‘MIN’ and ‘MAX’ marks.

If there is too little brake fluid in the system, this can pose a significant safety risk. Braking power decreases, the brake pedal feels soft or spongy, and in the worst-case scenario, air can enter the brake system, which can result in a complete failure of the brake function. The causes of a fluid level that is too low are usually leaks, worn brake pads or maintenance carried out too infrequently. In such cases, it is not only necessary to top up the brake fluid, but also to check the entire system for leaks and wear and tear.

If, on the other hand, there is too much brake fluid in the expansion tank, this can also cause problems. When heated up, the liquid expands and may overflow. As brake fluid is highly corrosive, it can damage paintwork and rubber parts. An excessively high level is usually caused by incorrect topping up. In this case, the excess liquid should be carefully drained off so that the level is once again between the ‘MIN’ and ‘MAX’ marks.

As part of this check, a visual inspection of the brake fluid can be carried out at the same time. New brake fluid is usually clear to slightly yellowish in colour. A dark or cloudy colour indicates contamination or ageing. As colour alone is not a reliable indicator of the condition of the brake fluid, the boiling point should then also be determined.

An electronic tester can be used to accurately determine the water content or boiling point of the brake fluid.

Modern test equipment usually uses conductivity or capacitance measurements to determine the water content as a percentage. The measurement is taken directly from the expansion tank, without the need to drain any brake fluid.

The brake fluid must be changed if the water content exceeds 3%, the measured wet boiling point falls below 150 °C, the fluid is noticeably discoloured, or the last change was more than two years ago.

7. Bleeding the brake system

Bleeding the brake system

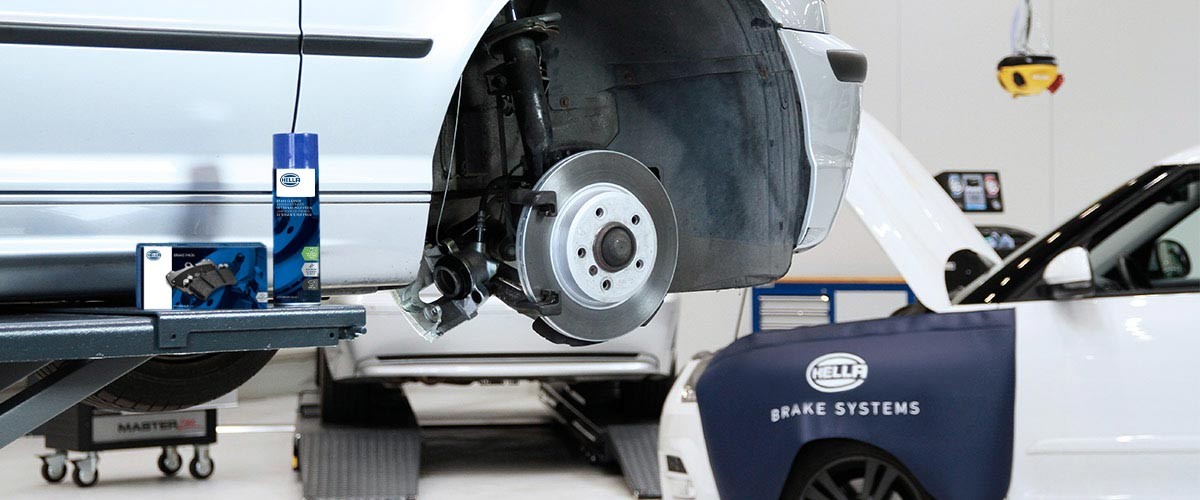
During the bleeding process, a bleeding device is used to pump fresh brake fluid through the hydraulic brake system, thereby completely removing any air from the system to ensure defined pressure behaviour. Bleeding is usually carried out via the bleed valves on the wheel brake cylinders or brake callipers. The standard sequence begins with the wheel position that is hydraulically furthest from the master brake cylinder. The exact order may vary depending on the vehicle and brake system, and must be observed and followed accordingly.

An example of the bleeding process

In order to collect the old brake fluid, a bleeding bottle is connected to the bleed valve on the brake calliper. Then the bleed valve is opened. When the brake pedal is depressed or a bleed device is operated, brake fluid is forced through the brake line system. The process is continued until clear (fresh) liquid emerges without any air pockets. The valve is then closed and the next wheel position is worked on in the same way. In this way the brake system is correctly bled, the right brake fluid for the vehicle is used and it is ensured that no air remains in the system – all of which guarantees optimum braking performance. For vehicles with ABS/ESP, manufacturer-specific guidelines apply, as certain valves in the hydraulic block can only be controlled using diagnostic tools. Once the work has been completed, the fill level in the storage reservoir is checked and adjusted to the maximum level.

Safety notice!

Once the bleeding procedure has been completed, the pedal pressure is to be checked by depressing the brake pedal several times while the vehicle is stationary. There must be a firm and stable pressure point. The brake pedal must not give way or feel spongy.

The brake fluid should only be changed by qualified technicians. It is imperative that the repair and maintenance instructions of each individual vehicle manufacturer are always strictly observed!

8. Product range and packaging

Product range and packaging

HELLA brake fluid is available in the following types of containers:

TypePart numberContainer / litre
DOT 38DF 355 360-0711.00
DOT 48DF 355 360-0010.25
DOT 48DF 355 360-0110.50
DOT 48DF 355 360-0211.00
DOT 48DF 355 360-0315.00
DOT 48DF 355 360-04120.00
DOT 4 LV8DF 355 360-0511.00
DOT 4 LV8DF 355 360-0615.00
DOT 45.18DF 355 360-0810.50
DOT 5.18DF 355 360-0911.00

Additional information

Further information on the subject of brake fluid can be found on the pages dealing with the following topics:

Replacing brake discs & callipers | HELLA
Brake fluid - product range | HELLA
Search | HELLA

9. FAQ - Frequently Asked Questions

FAQ - Frequently Asked Questions

Why can’t brake fluid with a higher DOT class basically be used as a replacement?

The reason is that, in addition to the boiling point and viscosity, material compatibility and vehicle-specific approval are also crucial.

Why is the viscosity of the brake fluid particularly important in ABS and ESP systems?

Because an unsuitable viscosity can impair the rapid hydraulic control operations of ABS and ESP, particularly at low temperatures.

Why can the brake fluid level drop even though the brake system is leak-free?

This is because, as the brake pads wear down, the pistons extend further, causing more brake fluid to be trapped in the wheel brakes.

Why isn’t a spongy pressure point automatically a sign of old brake fluid?

This is because air in the hydraulic system, leaks or errors made during bleeding can also cause the pedal to feel soft or spongy.

Why might conventional bleeding not be sufficient after work has been carried out on the ABS/ESP hydraulic system?

Because air can remain in internal passages or valve areas of the hydraulic unit, some of which can only be flushed out via a diagnosis-based control system.

Why is the colour of the brake fluid not sufficient on its own to assess the condition of the brake fluid?

Because the visual change does not provide a reliable indication of the water content or of the actual boiling point of the brake fluid.

Why does brake fluid absorb moisture even in a sealed brake system?

Because glycol-based brake fluid is hygroscopic and can absorb moisture through, amongst other things, hoses, seals and the expansion tank.

What is the significance of the wet boiling point when brake fluid is being assessed?

The wet boiling point indicates how temperature-resistant a brake fluid remains after absorbing a defined amount of moisture, and serves as an important parameter for its thermal resistance.

Spare Parts Finder
Manual vehicle identification OE-No.
Top manufacturers
Other manufacturers
Vehicle series Back
Vehicle Back

Enter the OE number in the input field. You will usually find the OE number on the spare part itself or in the vehicle documents.

Spare Parts Finder
Also determine spare parts with OE numbers Detailed product information Find wholesalers near you
dummy
Processing Selected Car
Manufacturer
Vehicle series
Vehicle
Engine output
Engine displacement
Fuel type
Construction year
Engine code

Choose category:
Back
dummy
Teilen Sie
Send via Copy link
URL copied to the clickboard !
Article NUmber
Number
Article Number Was Copied !
Search The Web Mounting Instructions
More Details
Name Value
Less Details

Your Dealer
Autoteile Krammer GmbH
dummy
Lechstraße 1-3
68199 Mannheim
Show Map

This might also interest you

Identifying typical signs of damage to commercial vehicle brake pads: Causes, effects and recommended measures for workshop diagnosis.
Basic Knowledge
Damage assessment: CV brake pads
Identifying typical signs of damage to commercial vehicle brake pads: Causes, effects and recommended measures for workshop diagnosis.
Reading Time: 7 minutes
Replace handbrake cable
Basic Knowledge
Replace handbrake cable: Mazda example
Step-by-step instructions for changing the handbrake cable - from checking for faults to adjusting the handbrake.
Reading Time: 5 minutes
Electric parking brake
Basic Knowledge
Electric parking brake
Basics of the electric parking brake: Setup, troubleshooting, maintenance and repair for your vehicle workshop.
Reading Time: 14 minutes
Two-piece brake discs
Basic Knowledge
Two-piece brake discs - Maintenance tips
Find out more about two-piece brake discs: Assembly, wear, testing and maintenance - everything for the car workshop.
Reading Time: 7 minutes
Diagnosing brake problems
Basic Knowledge
Failure modes of brake discs and brake pads
Damage patterns of brake discs and brake pads explained - possible causes, effects and remedial measures for the workshop.
Reading Time: 11 minutes
Floating calliper guide pins
Basic Knowledge
Floating calliper guide pins - practical repair tips
Repair instructions for guide pins on the cantilever saddle - effects of seized guide elements and test methods.
Reading Time: 3 minutes
Repairing brakes: important information
Basic Knowledge
Repairing brakes: Important tips
Instructions for professional brake repair: Noise avoidance, labelling of brake pads and important secondary measures.
Reading Time: 7 minutes
Checking the brakes
Basic Knowledge
Checking the brakes
Faults and common defects in brakes: Basics of brake testing and measures for fault detection in the vehicle workshop.
Reading Time: 5 minutes
Changing brake pads, brake discs and brake calipers
Basic Knowledge
Changing the brake discs, brake pads and brake calipers
Instructions for changing brake discs and brake callipers - everything you need for installation and fitting.
Reading Time: 10 minutes
Brake line and hand brake cables
Basic Knowledge
Brake line and hand brake cables
Step-by-step instructions for changing the handbrake cable - from checking for faults to adjusting the handbrake.
Reading Time: 6 minutes

Quick question

How likely is it that you would recommend HELLA?

highly unlikely
very likely
highly unlikely
very likely

Thank you very much!

Your feedback helps us to further develop our services.