Checking the brakes

Here you will find useful basic information and handy tips relating to brakes.

Problems with the brakes, such as the widespread issue of brake judder, cannot always be traced back to faults in the brake itself. This page explains the causes that can lead to complaints regarding the brakes, and provides step-by-step instructions on how you can localize them.

Important safety note The following technical information and practical tips have been compiled by HELLA in order to provide professional support to vehicle workshops in their work. The information provided on this website is intended for use by suitably qualified personnel only.


FAULTY BRAKES – FAULTS AND COMMON DEFECTS: Basic principles

Faults and common defects

Background information on problems and their causes in connection with disk brakes.

CHECK CAR BRAKES – MEASURES FOR IDENTIFYING SOURCES OF FAULTS: TROUBLESHOOTING

Check, determine and replace as needed: Tips on how to avoid complaints

WHEEL BEARING

  • Play/damage ✓


WHEEL HUB

  • Clean (metallically bright) ✓
  • Axial run-out deviation using dial gauge ✓
  • Detectible damage ✓
  • Corrosion protection (no solid constituents) ✓


AXLE NUT

  • Strength and securing ✓


WHEEL BOLT THREAD

  • Damage ✓
  • It must be easy to manually screw in the bolts ✓


TRANSVERSE CONTROL ARM BEARING

  • Replace in the case of increased play or porosity ✓

TRANSVERSE CONTROL ARM

  • Replace in the case of increased play or porosity ✓


Caution!
Depending on the axle design, an impermissible play can be difficult to determine.

SUPPORTING JOINT

TIE-ROD END

  • Joint play ✓
  • Check sealing collar for porosity and leaks ✓
  • Fixing of joints (locking screws) ✓

BRAKE CALIPER

Piston

  • Leak-tight, smooth running, dust sleeve ✓
  • Leak-tight, porous ✓


Caliper housing

  • Damage ✓


Slide piece

  • Play, smooth running ✓
  • Seal ✓

BRAKE HOSE

  • Leak-tight, porous, chafing points ✓
  • Inner diameter (swollen) ✓
  • Screw connection ✓
  • Observe maximum service life ✓

SUSPENSION STRUT

  • Leak-tight (detectable oil leakage) ✓
  • Damper performance test in advance ✓
  • Broken spring ✓
  • Damper mounting ✓
  • Mounting ✓


Caution!
Chassis changes impact the effect and comfort of the brake system.

DRIVE SHAFT SLEEVE

  • Leak-tight, porous ✓
Important notes and explanation

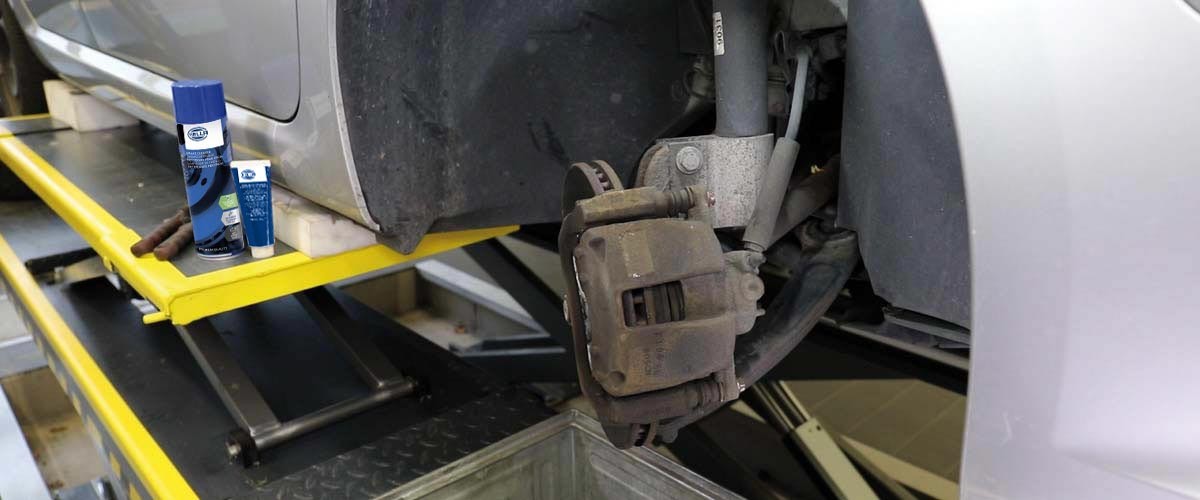
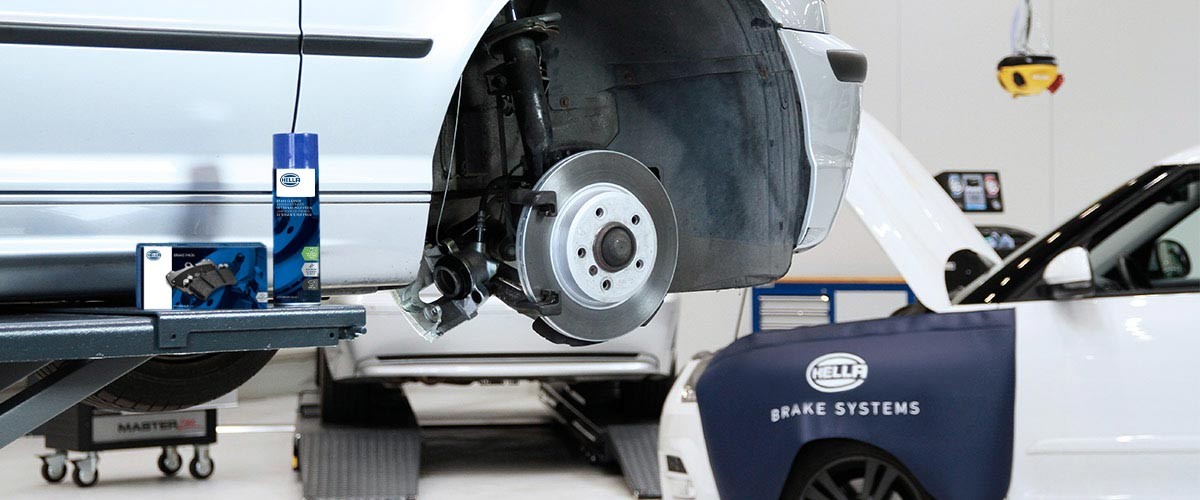
A basic prerequisite for every repair is that all components are cleaned, followed by lubrication of all necessary spots in the area of the guide shafts for the brake pads and/or at the mounting points of the brake shoes using a non-conductive, high-temperature-resistant, solid-free (non-metallic) paste from our product range that is suitable for ABS vehicles.


Do not use copper paste!


All components which were not assessed as OK must be strictly exchanged according to the guidelines of the vehicle, system, and brake manufacturers. Observance of the notes helps to avoid technical problems and complaints.


Follow the instruction leaflets!
Observe the instruction leaflet in the HELLA PAGID BRAKE SYSTEMS disk brake pad packages. Here you can find notes on special installation instructions, such as

  • Directional disk brake pads
  • Color marking of the backing plate and its meaning
  • Warnings regarding work on the electro-hydraulic brake system
  • Disk brake pads with removable foil on the rear plate for adhesive fixing, etc.


Take care when working on vehicles with an electro-hydraulic brake!
When working on vehicles with an electro-hydraulic brake (e.g. SBC Sensotronic Brake Control), never change the pads and the brake fluid at the same time! Work on the electronic brake system may be performed by trained personnel only.


Follow the instructions from the vehicle and brake system manufacturers!
Always follow the instructions from the vehicle and brake system manufacturers regarding repair and maintenance work.

CHECKING CONCENTRICITY AND NON-UNIFORM THICKNESS: INSTRUCTIONS

When carrying out the repair, test procedures such as checking the concentricity (lateral runout) and checking non-uniform thickness (varying disc thickness) of the brake disc may be required.

Checking the concentricity of the brake disc

  • Perform the check with the discs installed ✓
  • Fasten the brake disc to the wheel hub with all wheel nuts and corresponding washers ✓
  • Fasten the dial gauge with holder to the suspension strut ✓
  • Place the dial gauge approx. 10 - 15 mm below the outer radius of the disc and align with 'zero' ✓
  • Turn the brake disc in the direction of travel ✓
  • Measured over several wheel revolutions, deviations should not exceed 0.070 mm for new vehicles and 0.10 mm for older vehicles ✓
  • The test only produces meaningful results for new brake discs. If deviations are found, the state of the wheel hub and bearing should be considered as additional fault sources ✓

Checking the concentricity of the wheel hub

  • Attach the dial gauge and align it at the outer edge of the wheel hub ✓
  • Turn the wheel hub at a constant speed in the direction of travel ✓
  • Measured over several wheel revolutions, deviations should not exceed 0.03 mm ✓
  • If the deviations are greater, replace the hub ✓


Note:
If hub eccentricity exists, the lateral runout at the outer edge of the disc will be twice as much.

Checking the friction ring for variation in thickness

The thickness difference measurement of a brake disc can only be verified using special measuring tools. A micrometer screw provides sufficient measuring accuracy of ± 0.001 mm.
The measurement should be taken at 12 to 15 positions on the circumference and approx. 10 – 15 mm below the outer friction radius. Depending on the vehicle type, judder phenomena can be caused by thickness differences as small as 0.012 mm to 0.015 mm. These values must therefore not be exceeded on new brake discs.

NOTE!

Please always observe the model-specific technical specifications of the vehicle manufacturer in this regard.

How helpful is this article for you?

Not helpful at all

Very helpful

Please tell us what you did not like.
Many thanks. But before you go.

Sign up for our free HELLA TECH WORLD newsletter to receive the latest technical videos, car repair advice, training course information, marketing campaign details and diagnostic tips.

Show additional information on our newsletter Hide additional information on our newsletter

Register for our free HELLA TECH WORLD newsletter to stay up-to-date with the latest technical videos, car repair advice, trainings, diagnostic tips and marketing campaigns.

Together we can get cars back on the road quickly!

Please note:
You will only be subscribed to the newsletter once you have clicked on the confirmation link in the notification e-mail you will receive shortly!

Data Protection | Unsubscribe

Please note:
You will only be subscribed to the newsletter once you have clicked on the confirmation link in the notification e-mail you will receive shortly!

Data Protection | Unsubscribe

Almost there!

All you need to do is confirm your sign up!
We've sent an e-mail to your email address.

Check your inbox and click on the confirmation link to start receiving HELLA TECH WORLD updates.

Wrong e-mail or no confirmation received?
Click here to enter it again.