Condensation in headlight

Here you will find useful information and handy tips relating to humidity in the headlamp and other vehicle lamps.

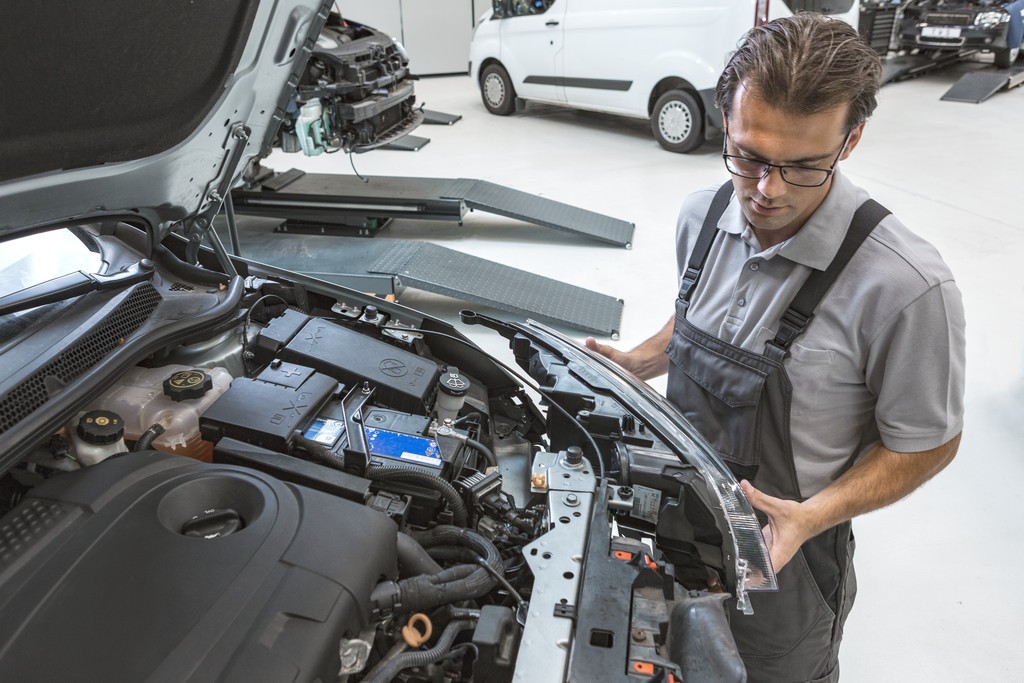
If headlamps or other vehicle lamps are fogged up on the inside, car drivers usually consider this to be a defect. However, in some cases this is a physical phenomenon. This page explains how this can come about. You will also find out what to do if water collects in the headlamp or other vehicle lamps. There is also a step-by-step guide for replacing faulty lamps, which provides a number of practical tips.

Important safety note The following technical information and practical tips have been compiled by HELLA in order to provide professional support to vehicle workshops in their work. The information provided on this website is intended for use by suitably qualified personnel only.


INFLUENCE OF HUMIDITY ON PHOTOMETRIC SYSTEMS: BASIC PRINCIPLES

If humidity penetrates into a lighting system, the impairment to the light distribution or light output as perceived by the driver only represents the obvious effect. The corrosion caused by humidity is a much more serious problem in many cases. Whereas excessive fogging in headlamps and other lamps can be seen quickly, corrosion works in hidden spots. The whole extent of the “decay” only comes to light when diagnostics take place, e.g. when one of the light functions fails. Corroded plug connections, crimp contacts that have been oxidized away, and completely dilapidated bulb holders are only a few examples of what can be found. Compared with commercial vehicles and passenger cars, this subject is even more of an issue with motor homes and caravans. Here, penetrating humidity may not only damage the light and its wiring, it can also spread into the insulation of the bodywork, which can result in mold forming.


The most important points related to proper repairs will be explained using the example of various lamps on a motor home.


First, let us explain a few physical laws related to humidity in lighting systems. These can be used as basic information when talking to customers.

Fogging in lamps

If complaints are received about the above, this does not necessarily mean there is a fault in the lighting. When the cover lens fogs up, the photometric output area should dry within a certain period after the light bulb has been switched on. However, this process can happen more or less quickly depending on the ambient temperature and relative air humidity. This process is completely in line with normal physical laws and completely harmless from a technical point of view, since the reflector is protected against the influence of fogging.


When the light bulb is switched on, the air inside the light heats up. The expanded, heated, and dry air is displaced out of the housing of the rear combination lamp through the ventilation slits. After the light bulb has been switched off, the air in the rear combination lamp slowly cools down again. This causes saturated humid air from outside to be “sucked” into the light interior. This can lead to condensation on the inside of the cover lens on account of high air humidity and greater temperature differences inside the light. This condition occurs more frequently in the cold months and in humid weather. However, if there is so much fogging that water drops form on the cover lens (see Figure 1) or water even accumulates in the lower area of the light (see Figure 2), the seal should be checked for damage and replaced if necessary.


Equally, any “blockage” of the light ventilation openings should be checked. The light can be blasted with oil-free compressed air to dry it out. If water still accumulates in the light after this process, the light has to be replaced.

Capillary effect

The capillary effect in lamps is a less well-known subject. This phenomenon is often responsible for water penetrating into a light and accumulating in it. The capillary effect describes the property of liquids to spread to different extents in narrow tubes or cracks.


In the case of an electric cable, the capillary effect is that water molecules and molecules of the cable sheathing gravitate towards one another. The tighter a capillary is (capillary = tight cavity), the greater this gravitational effect. For the capillary effect to have any effect at all, water has to get into the cable. This is often due to a plug connection not being waterproof. Simple blade terminals, incision-type connectors (current thieves) etc. do not offer the cable sufficient protection against humidity. This means that water can penetrate the cable through poorly or non-insulated cable areas under the cable sheathing (insulation) (see Figure 3).


Through the capillary effect in the cable, humidity penetrates between the copper wires and cable sheathing into the light.


For this reason, waterproof connectors and cable connections such as Superseal connectors (see Figure 4) should always be used.

TROUBLESHOOTING ON FOGGED LIGHTING SYSTEMS: TROUBLESHOOTING

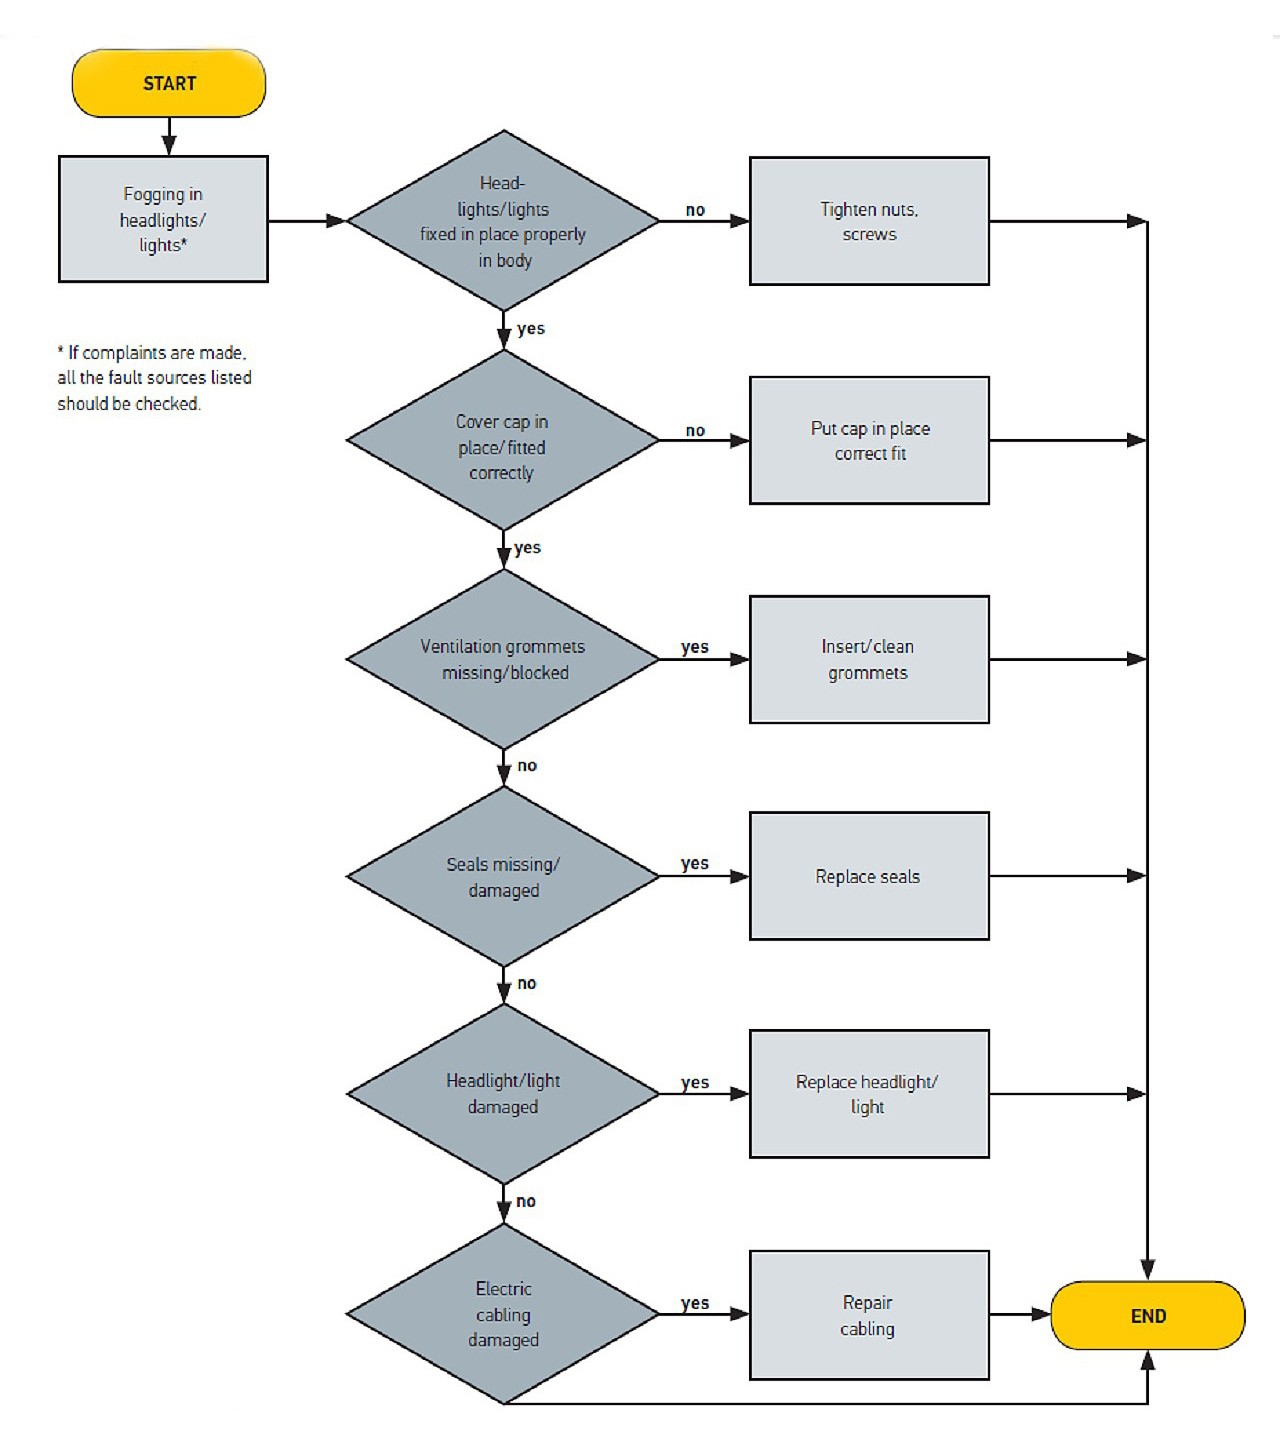
If a driver complains about heavy fogging on their vehicle’s lighting equipment, this can have several causes. A systematic procedure is thus essential to fast and reliable troubleshooting. The troubleshooting tree (see diagram) illustrates the main testing steps.

Condensation in headlamp: Troubleshooting

REPAIR WORK ON THE STOP LIGHT: INSTRUCTIONS

Failure of a light function is often the reason for a visit to the workshop.


In the case described here, the left stop light and one side marker light have failed. The reason becomes obvious when dismantling the lamps. The rear combination lamp is not sealed against the plastic body, so that there is nothing stopping dirt and water penetrating the light (see Figure 5 and 6). The bulb holder, the bulb sockets, and the crimp contacts are corroded so heavily that they have to be replaced completely. In addition, the cable duct into the body is not sealed, so that water penetration has left clear traces here, too.


For these reasons, a certain assortment of installation material is required for professional repairs. You can see a selection in Figure 7.

Pinch the corroded crimp contacts off the cables

Pinch the corroded crimp contacts off the cables and dismantle the bulb holder from the light.

Lay the cables together

Pull suitable heat-shrinkable plastic tubing (pay attention to the diameter) over the cable near the cable duct and heat it using a hot air gun until it is tight against the cables.

Select a matching plug and put a hole through the centre

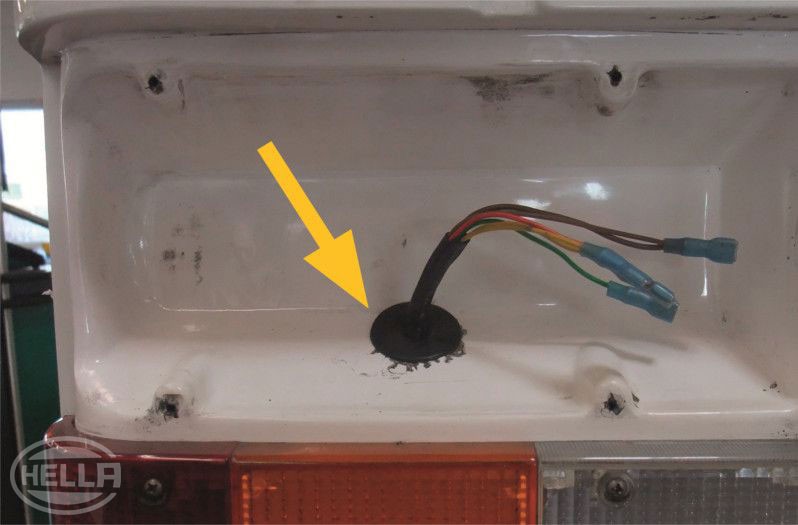
Various caravan and motor home manufacturers create a cable duct using a bore hole. If these are not sealed, rubber plugs can be used. These are offered in different sizes in kits and are versatile. Select a matching plug and put a hole through the centre. The diameter of the hole should be a little smaller than the diameter of the cable with heat-shrinkable plastic tubing. This ensures that no water can penetrate the interior between the heat-shrinkable plastic tubing and plug after the plug has been mounted.

Strip the cable ends

Strip the cable ends to approx. 10 mm and fit crimp contacts e.g. HELLA no. 8KW 732 567-003. Then heat the shrink sleeves of the crimp contacts using a hot air gun until they are tight against the cable.

Insert the rubber plug in the bore hole

Glue cellular rubber strips to the contact face

To prevent water and dirt penetrating the light as before, we recommend the use of thin strips of cellular rubber. These are available in a wide range of versions in terms of thickness and width. It is important that they have an adhesive coating on one side. Glue the cellular rubber strips all the way round the contact face of the light. A small section approx. 1 cm long should remain free at the lower edge to allow condensation etc. to flow away.

Fit light bulbs in the bulb holder

Fit light bulbs in the bulb holder and insert the crimp contacts.

Blast dirt out of the light

Blast dirt out of the light using oil-free compressed air.

Mount the bulb holder on the light

Mount the bulb holder on the light and then screw this to the body tightly again.

REPAIR WORK ON THE SIDE MARKER LIGHT: INSTRUCTIONS

The same problems can be seen after dismantling the side marker light. Here, sealant has been used generously in the past to stop humidity penetrating in (see Figure 8). Unfortunately, this measure was not successful.


The crimp contacts are completely oxidised, which in the end led to the light failing.


Generally speaking, recessed luminaires with fitted light bulbs should never be fitted or sealed using sealant or adhesive. If one of the bulbs were faulty, the light would be extremely difficult to disassemble, if at all possible. In such cases, the only solution is “complete reconstruction”!

Clean the contact face

Use a suitable cleaning agent to remove sealant from the contact face.

Pinch off old crimp contacts

Strip the cable ends to approx. 10 mm and fit crimp contacts e.g. HELLA no. 8KW 732 567-003. Then heat the shrink sleeves of the crimp contacts using a hot air gun until they are tight against the cable.

Clean the contacts on the lamp base or replace the lamp base if necessary

This side marker light does not have a rubber seal to the plastic body. This means water can find a way between the body and the light housing in this case, too. This process is enhanced by the airstream. For this reason, O-rings should be used as seals for recessed luminaires with a round lamp base. If there are no suitable O-rings available, have a look in your O-ring box for air-conditioning systems. Slide the O-ring up to the light's base plate.


Caution! The O-ring must not be too thick. After assembly, the light should be flush to the body.

Fix the lamp base in the light

Insert crimp contacts on the lamp base

Insert crimp contacts on the lamp base and screw the light tightly to the body again.

Summary

When lighting systems are installed or repaired with the right know-how and material, the effects of humidity can be reduced to the minimum possible under the physical conditions. This applies for most LED lamps, as well as for lamps with conventional bulbs fitted.

How helpful is this article for you?

Not helpful at all

Very helpful

Please tell us what you did not like.
Many thanks. But before you go.

Sign up for our free HELLA TECH WORLD newsletter to receive the latest technical videos, car repair advice, training course information, marketing campaign details and diagnostic tips.

Show additional information on our newsletter Hide additional information on our newsletter

Register for our free HELLA TECH WORLD newsletter to stay up-to-date with the latest technical videos, car repair advice, trainings, diagnostic tips and marketing campaigns.

Together we can get cars back on the road quickly!

Please note:
You will only be subscribed to the newsletter once you have clicked on the confirmation link in the notification e-mail you will receive shortly!

Data Protection | Unsubscribe

Please note:
You will only be subscribed to the newsletter once you have clicked on the confirmation link in the notification e-mail you will receive shortly!

Data Protection | Unsubscribe

Almost there!

All you need to do is confirm your sign up!
We've sent an e-mail to your email address.

Check your inbox and click on the confirmation link to start receiving HELLA TECH WORLD updates.

Wrong e-mail or no confirmation received?
Click here to enter it again.