Vauxhall Corsa-D - Low beam: Replacing the H7 bulb | HELLA
Vauxhall
Corsa-D
MY: 2006–2014
Low beam: Replacing the H7 bulb
Replacing the halogen bulb in the right-hand low beam (front passenger side):
Work steps:
- Remove the air intake pipe (Fig. 1);
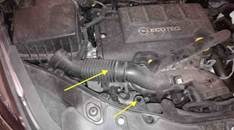 Fig. 1
- Release the fixing clamp (Fig. 2) from the suction hose.
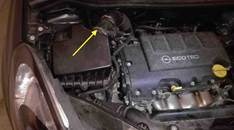 Fig. 2
- Release the air filter housing (Fig. 3) from the holders and then tilt by 90°.
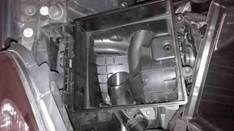 Fig. 3
- Unlock the locking clamp (Fig. 4)
- Remove the headlamp cover cap (Fig. 5)
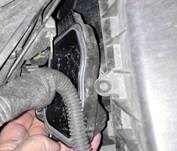
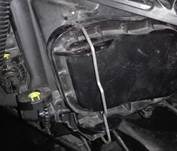 Fig. 4 Fig. 5
- Remove the connector. (Fig. 6)
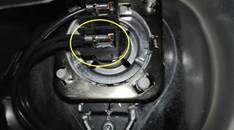 Fig. 6
- Remove the bulb, (Fig. 7) note the locking tabs.
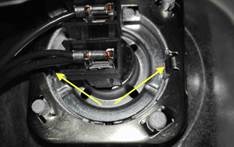 Fig. 7
- Insert a new bulb suitable for the recess (Fig. 8) and snap/clip into place (Fig. 7).
- Connect the connector.
- Correctly position the headlamp cover cap and lock the locking clamp.
- Reinstall the air filter housing and the suction hose.
 Fig. 8
Replacing the halogen bulb in the left-hand low beam (driver's side):
Work steps:
- Remove the filler tube container for the windshield washer system.
- Remove the cover cap from the headlight housing.
- Unlock the locking clip.
- Remove the wiring harness connector.
- Unlock and remove the bulb as for the right-hand side.
- Insert a new bulb suitable for the recess and clip into place.
- Reassemble in reverse order.
- Perform a functional test.
- Check the headlamp adjustment and correct if necessary.
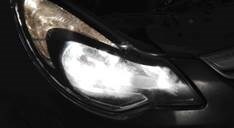 Fig. 9
Note:
Light sources should always be replaced in pairs — this applies especially for the low beam and high beam.
Hella H7 halogen bulbs
- 8GH 007 157-121
- 8GH 007 157-451
- 8GH 007 157-471
- 8GH 007 157-551
- 8GH 178 560-491
Important safety notice
The following technical information and tips for practical use have been set up by HELLA in order to offer professional support to automotive workshops in their daily work. The information available here on this website is only to be used by appropriately trained specialist staff.
The reprinting, distribution, reproduction, exploitation in any form and disclosure of the contents of this document, even in part, is prohibited without our express written approval and indication of the source. The schematic illustrations, figures and descriptions are for explanation and presentation of the document text and cannot be used as a basis for installation or design. All rights reserved.
Not helpful at all
Very helpful